Add and manage languages in Transtore
Transtore allows you to translate your store content into up to 20 target languages and display the translations on your storefront.
Follow the steps below to add, publish, and manage your target languages.
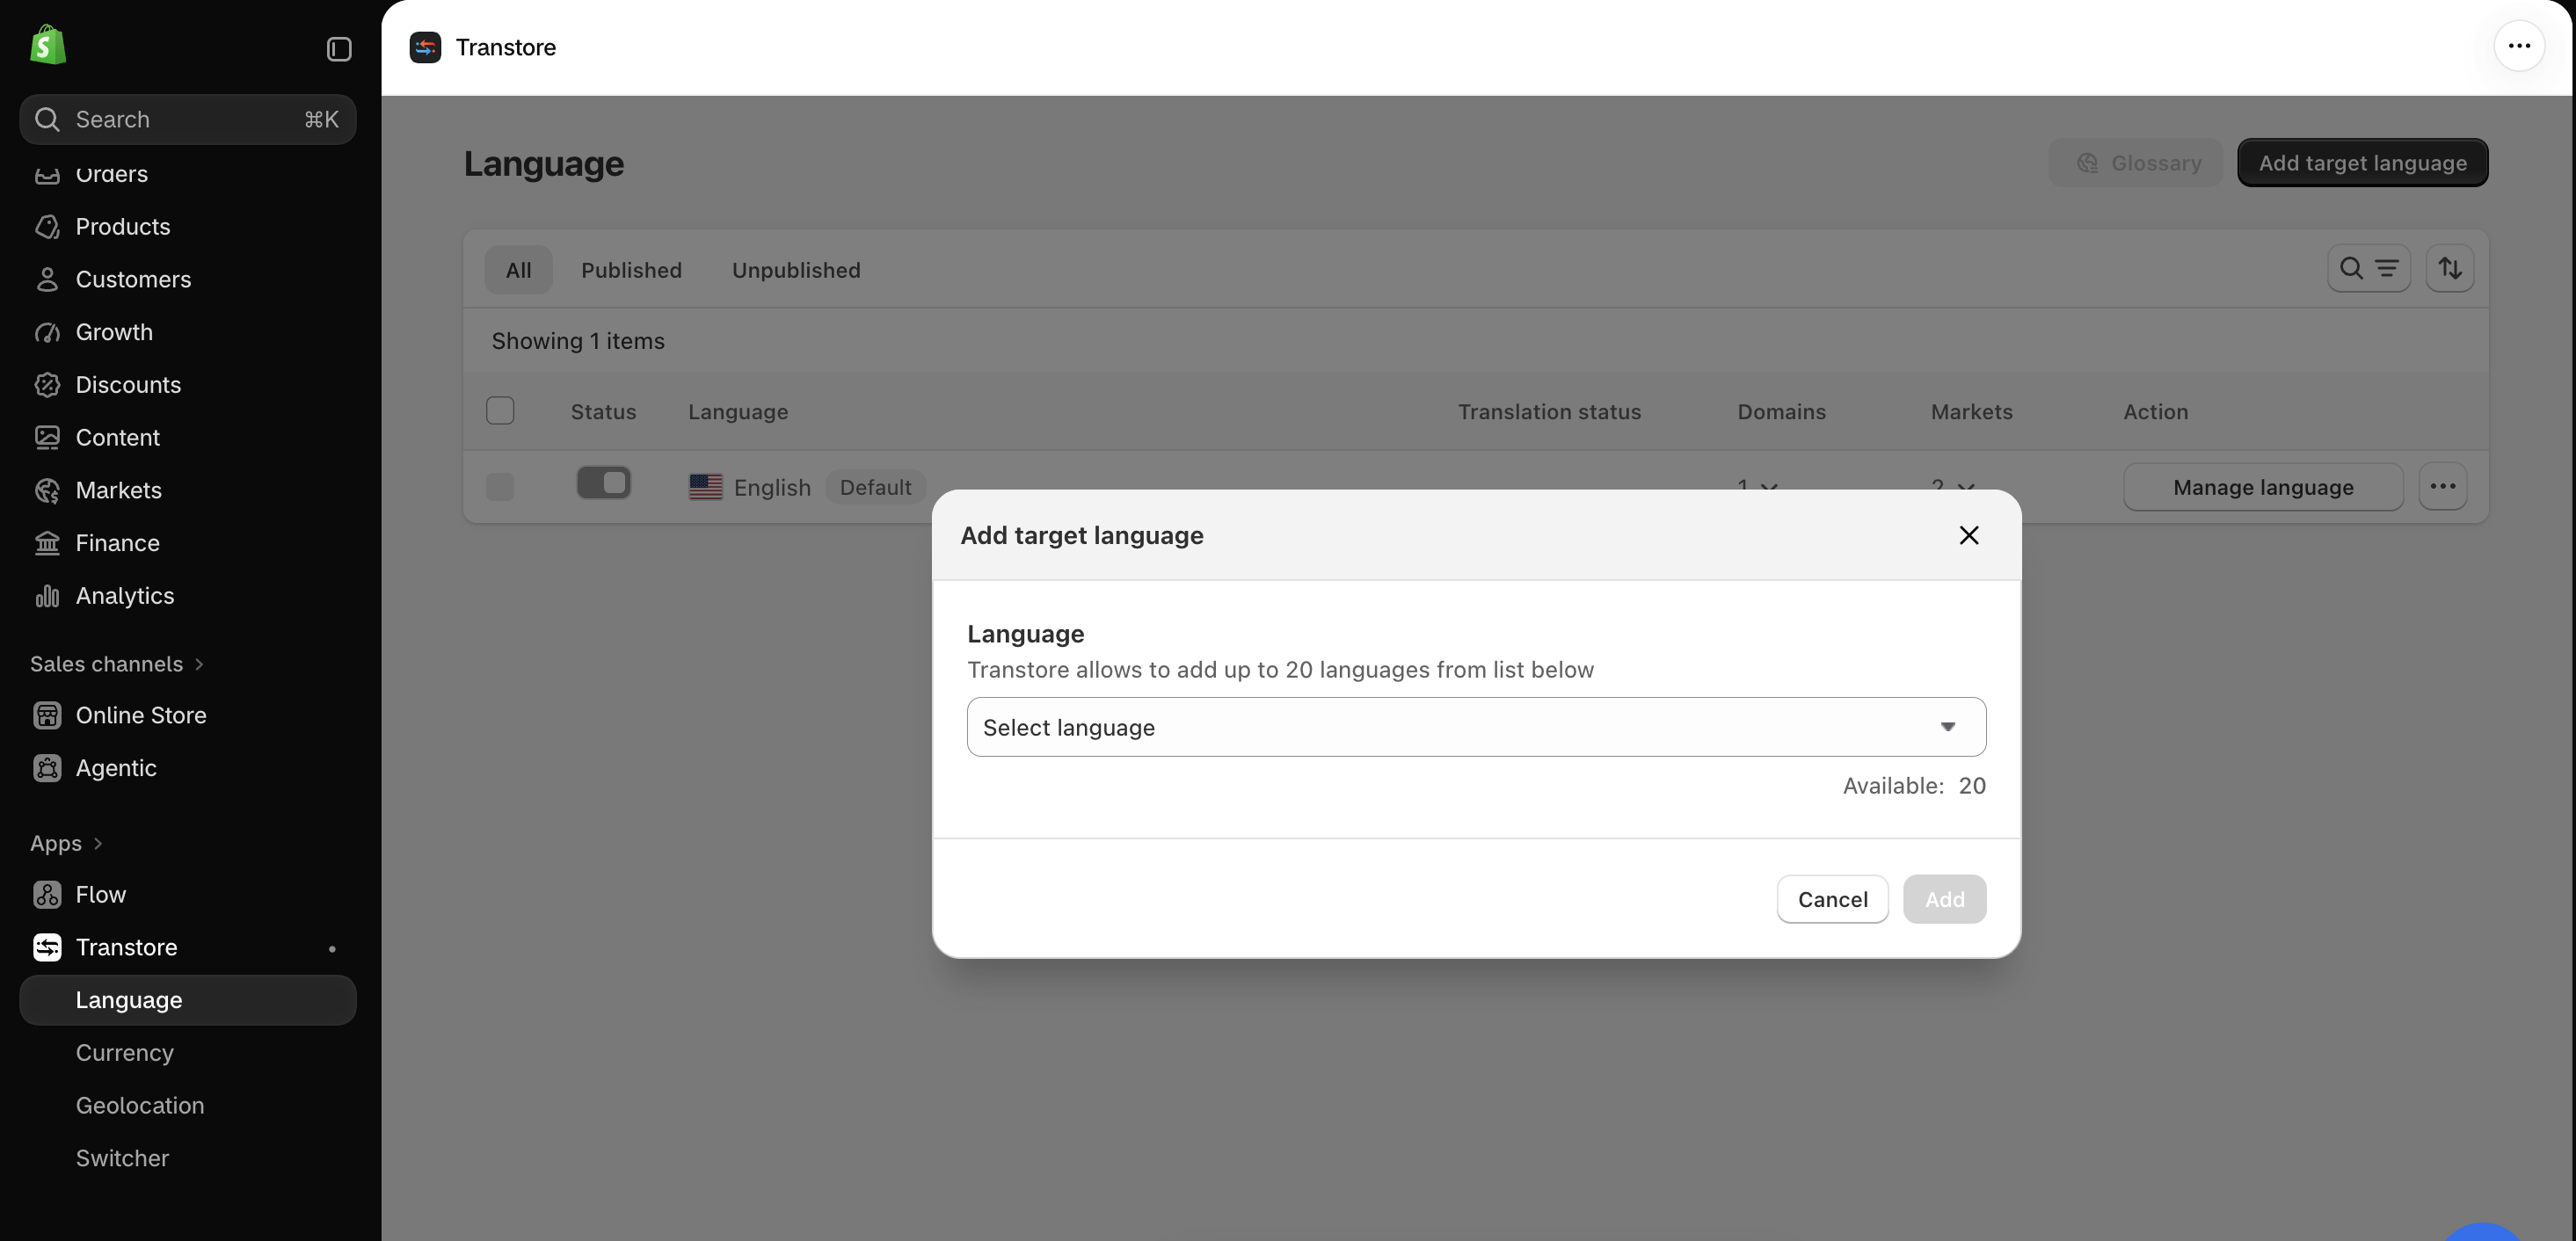
Step 1: Add target languages
- Open the Transtore app in your Shopify admin.
- Go to Language.
- Click Add target language.
- Select the languages you want to add.
- Click Add.
You can add up to 20 target languages.
Step 2: Publish the target languages
After adding your target languages, publish the languages you want to make available on your storefront.
Use the Status toggle beside a language to publish or unpublish it.
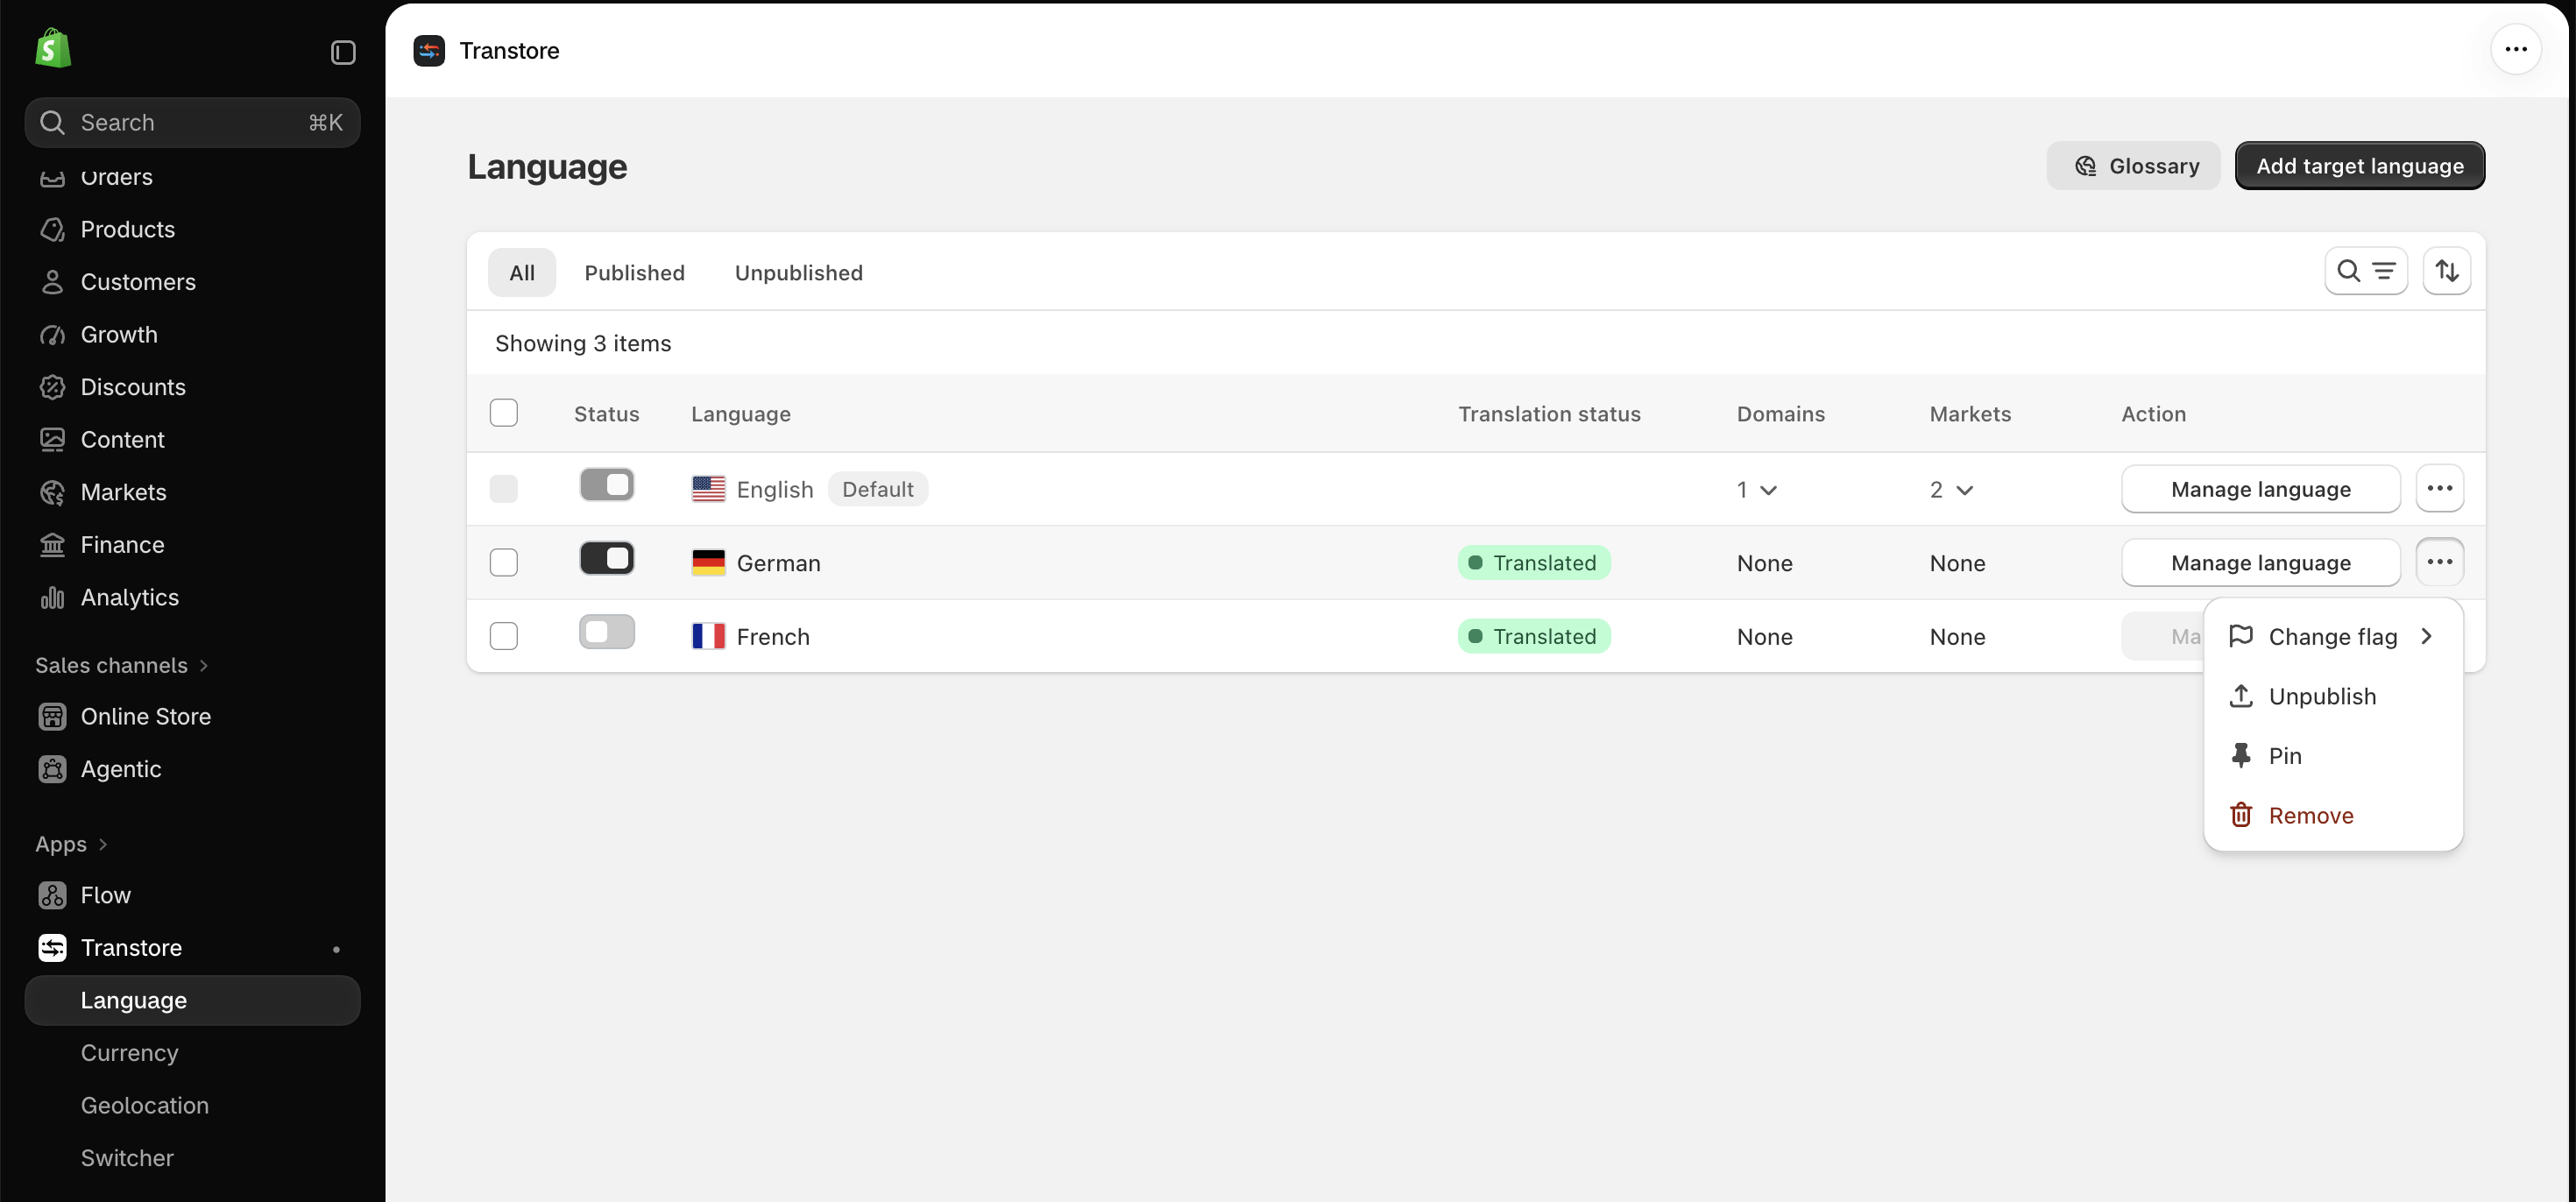
Step 3: Manage your languages
On the Language page, click the three-dot menu beside the language you want to manage.
- Change flag - Choose the flag displayed for the language.
- Publish / Unpublish - Make the language available on your storefront or hide it.
- Pin / Unpin - Add the language to or remove it from the top of the language list in the Switcher.
- Remove - Remove the language from your store.
You can skip Step 4 if the Transtore Switcher is already enabled and configured on your storefront. Step 5 is optional.
Step 4: Enable and configure the Switcher
To let visitors select a published language on your storefront, enable and configure the Transtore Switcher.
See Set up the Switcher for complete instructions.
Step 5: Set up Geolocation (optional)
Geolocation can recommend or automatically apply a language and currency based on a visitor's location.
See Set up Geolocation and configure its options for complete instructions.
After completing these steps, customers can browse your storefront in the published languages.
If you have any questions or need help adding or managing languages, please contact us at [email protected]. We’re always happy to help.