Customize flags, icons, text, and display options in the Switcher
Customize the Switcher separately for desktop and mobile. You can adjust its position, displayed items, colors, display formats, icons, and text labels.
Changes made under Desktop do not apply to Mobile, and vice versa. Configure the Switcher for each device based on how you want it to appear on your storefront.
Step 1: Open Switcher customization
- Open the Transtore app in your Shopify admin.
- Go to Switcher.
- Under Customization, select Desktop or Mobile.
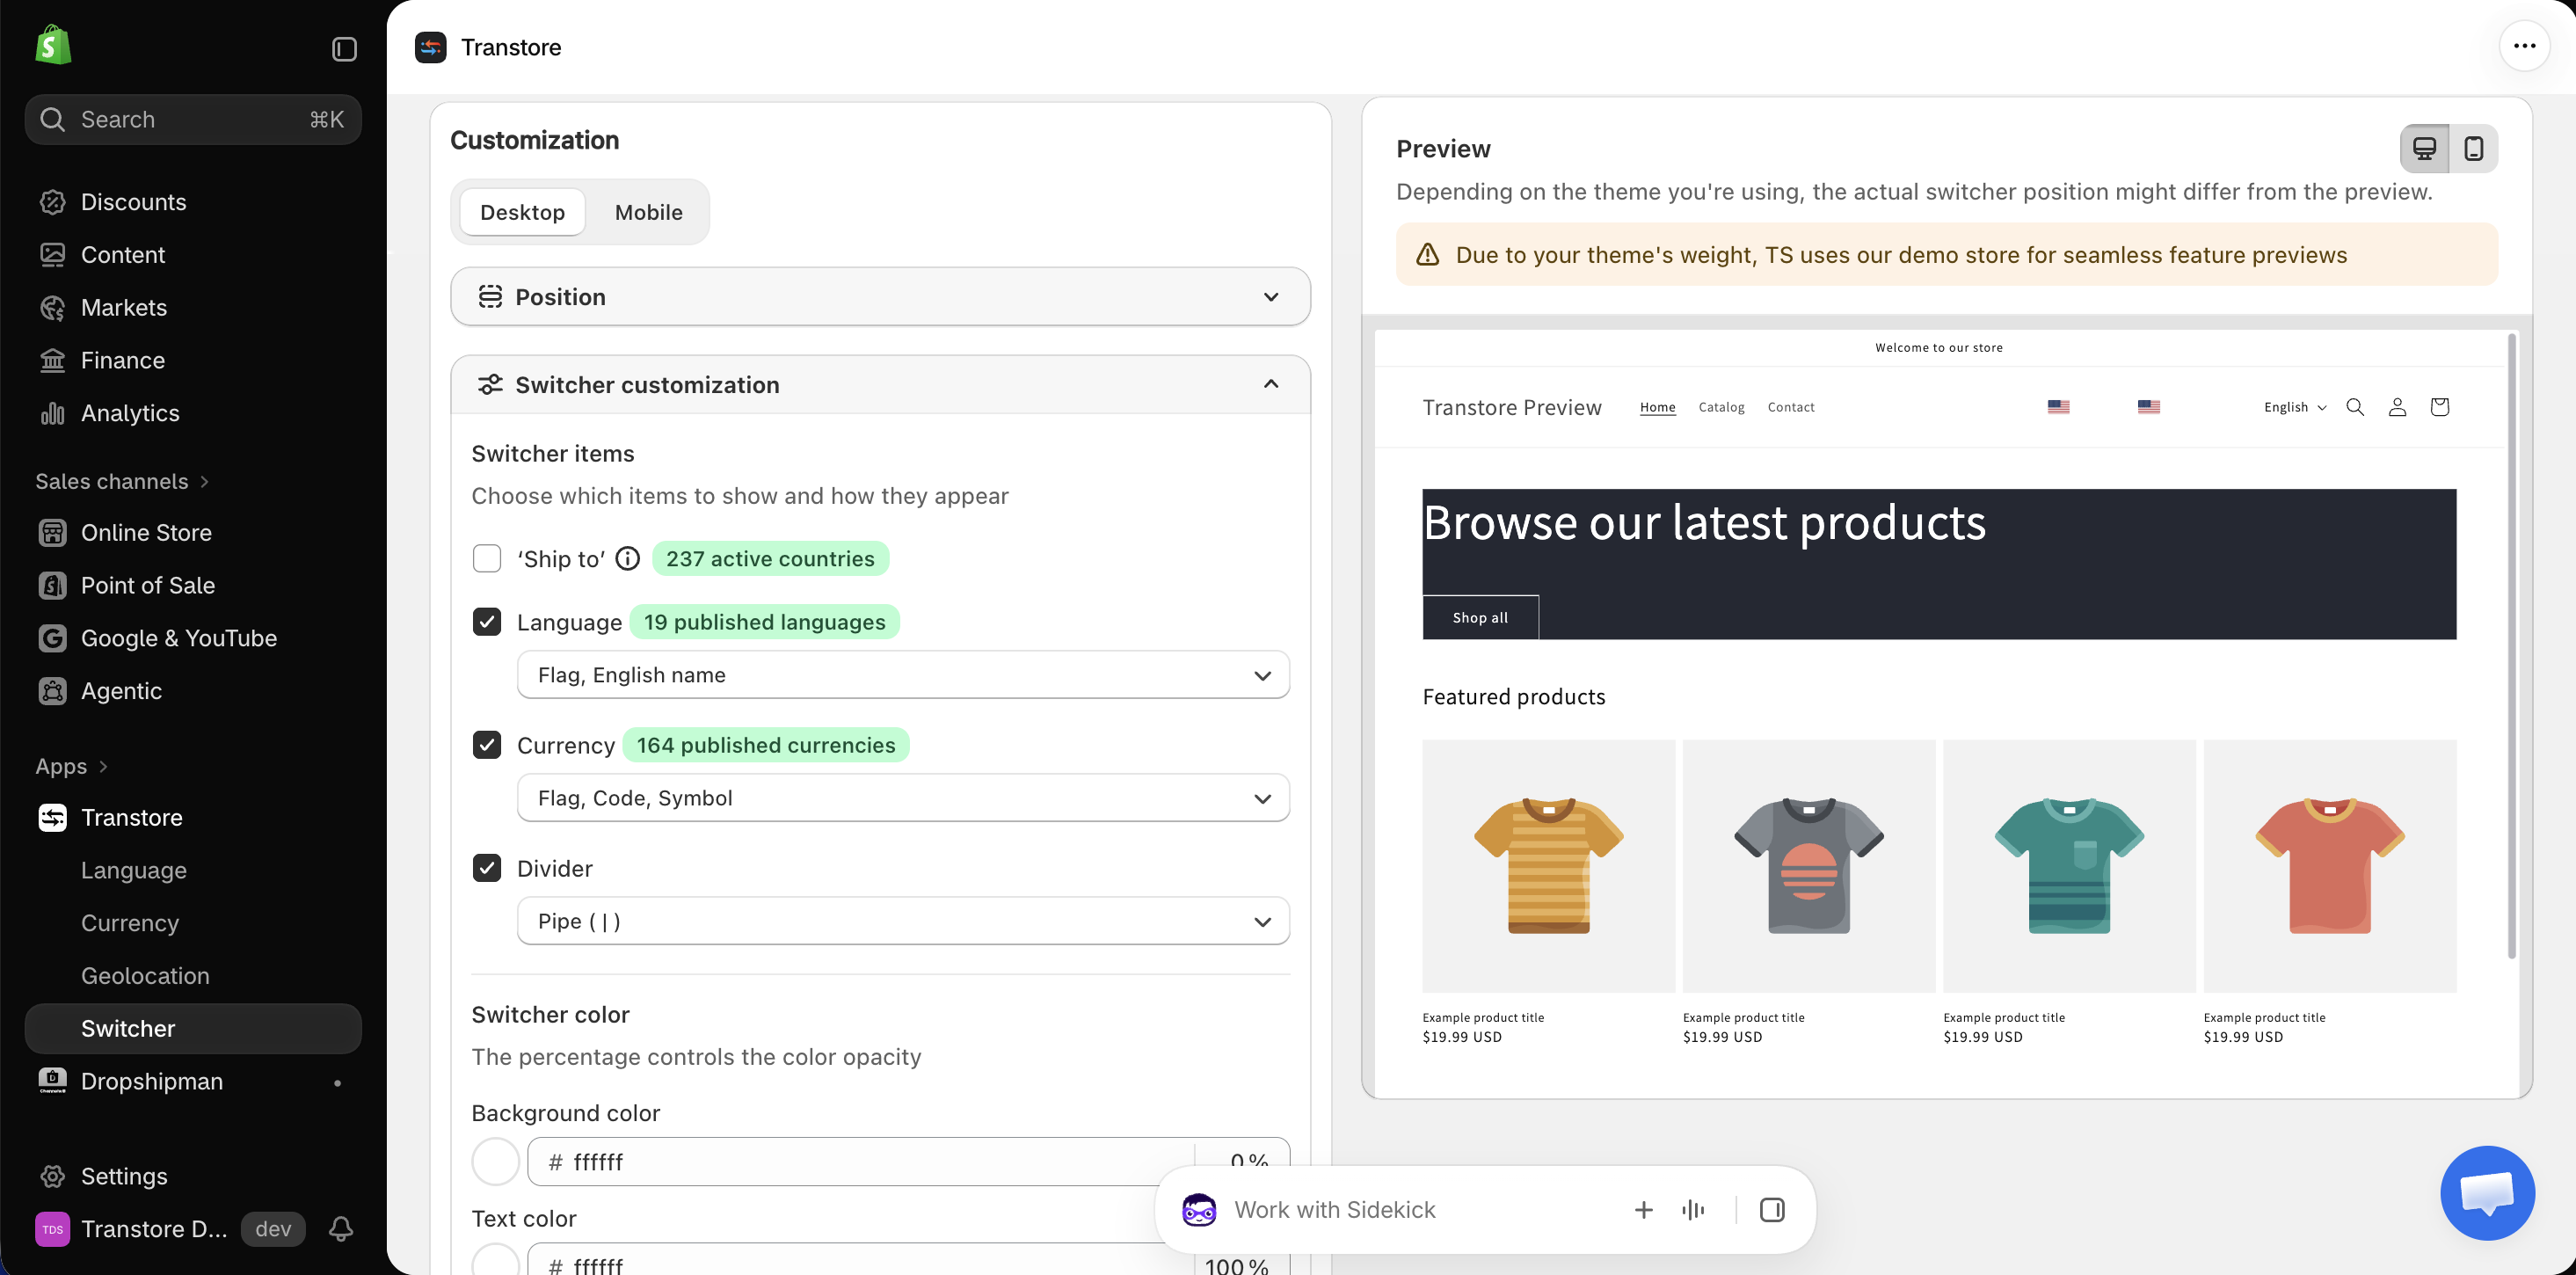
Step 2: Set the Switcher position
- Open Position.
- Under Choose position, select where the Switcher should appear on your storefront.
- If you select Embedded in the page, choose its Placement:
- Under Desktop, display the Switcher in the menu, footer, or both.
- Under Mobile, display the Switcher in the header, footer, or both.
If the Switcher does not appear in your preferred location, see Embed and position the Switcher in your header or footer.
Step 3: Configure Switcher customization
Open Switcher customization to choose which items customers see and how they appear.
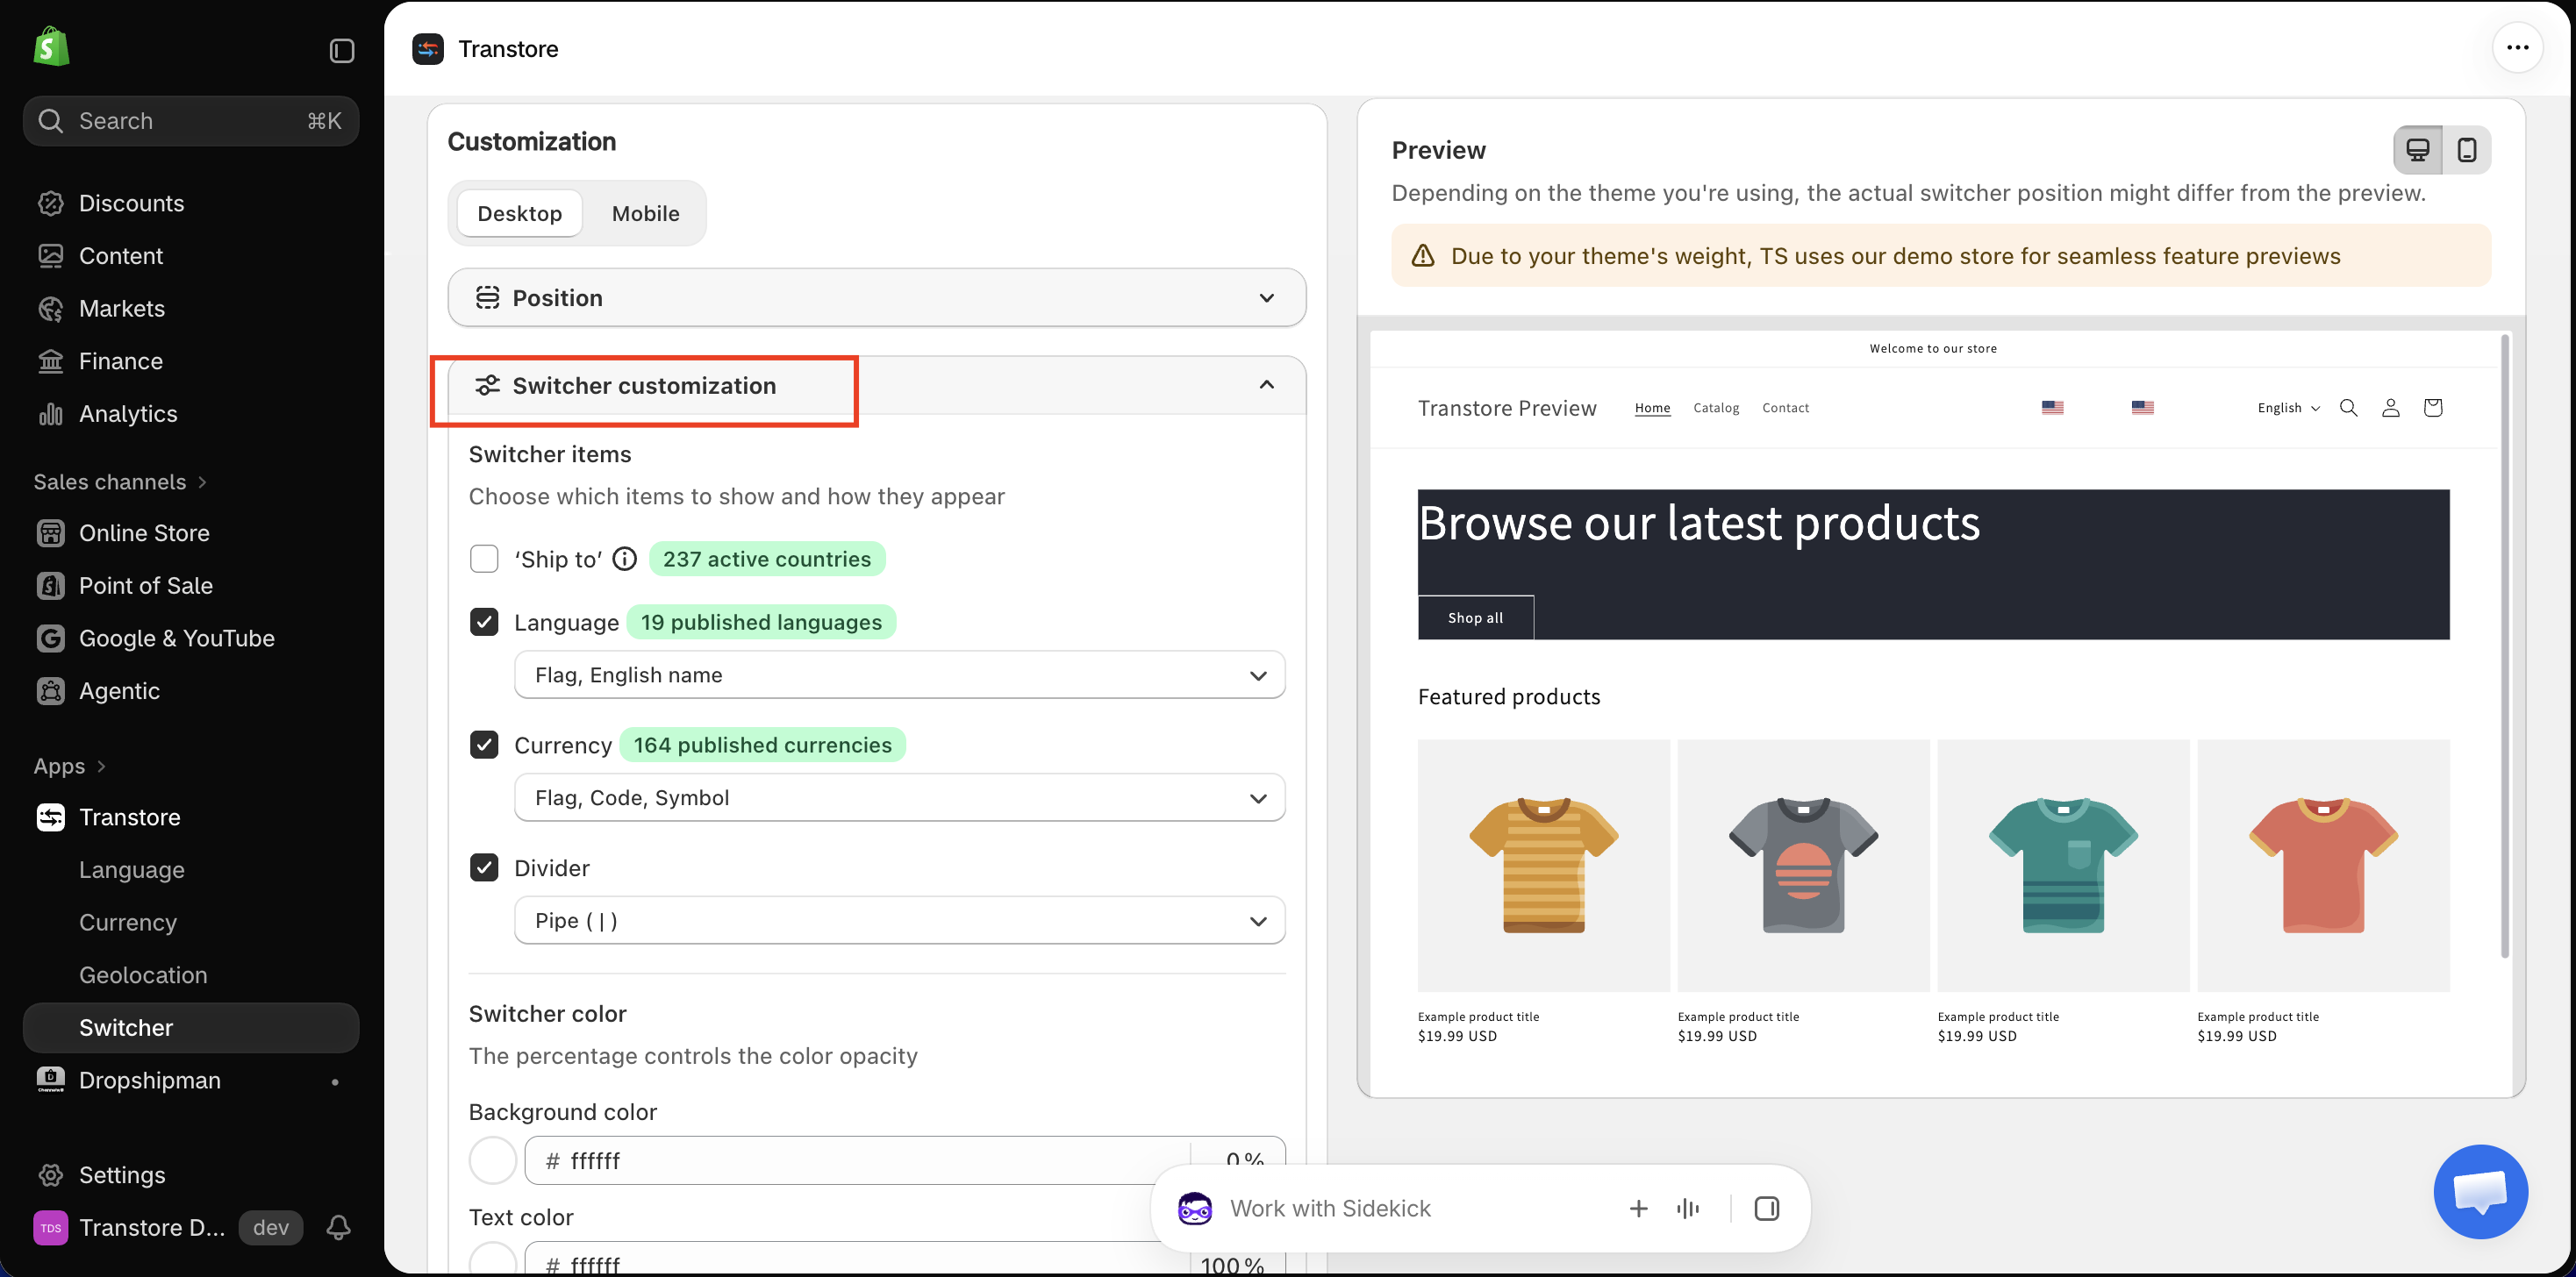
Desktop - Switcher items
Select the items you want to display:
- 'Ship to'
- Language
- Currency
- Divider
For each enabled item, use the dropdown to choose its display format. The available options may include a flag, English name, native name, currency code, or currency symbol, depending on the item.
If you enable Divider, choose the separator displayed between the Switcher items, such as Pipe ( | ).
Mobile - Switcher showing
Select the items you want to display:
- 'Ship to'
- Language
- Currency
For each enabled item, choose its display format and icon. For example, you can select Icon, Don't show name, then choose an icon style such as Globe filled.
Switcher color
Customize the colors used in the Switcher:
- Background color - Select the Switcher's background color and opacity.
- Text color - Select the color and opacity of the Switcher's text and icons.
Step 4: Configure Switcher menu customization
Open Switcher menu customization to control how items appear after a customer opens the Switcher.
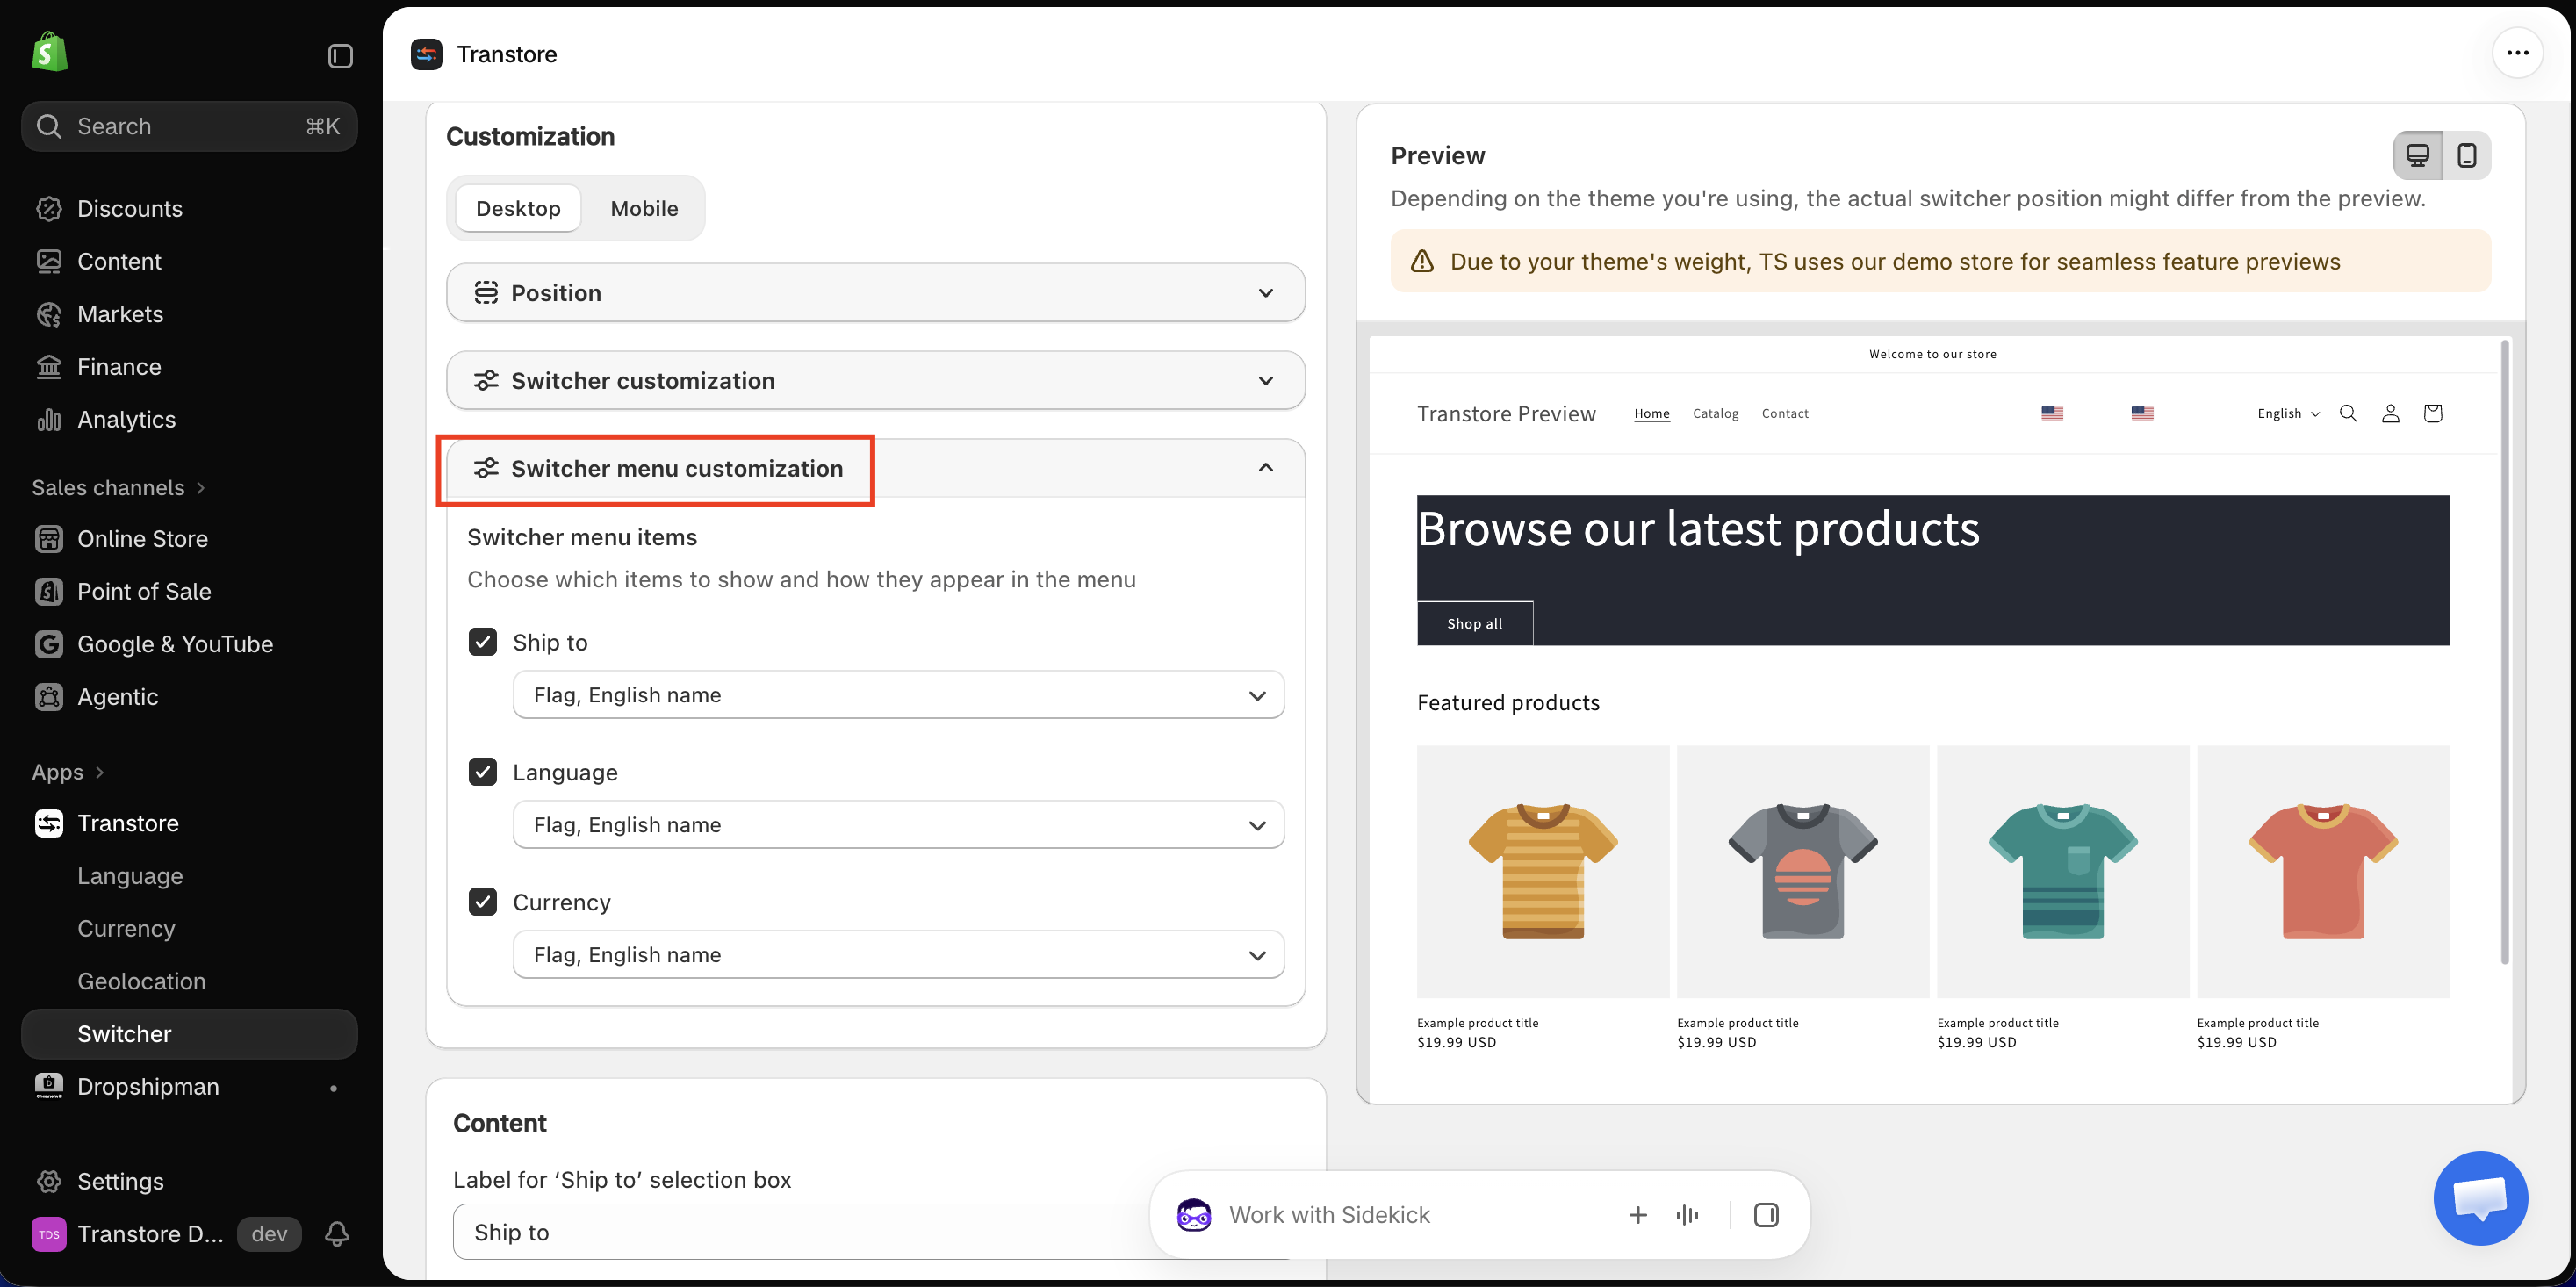
Under Switcher menu items, select the items you want to display:
- Ship to
- Language
- Currency
Use the dropdown below each enabled item to choose its display format.
Step 5: Edit the Switcher text
Scroll to Content and update the available labels:
- Label for 'Ship to' selection box
- Label for language selection box
- Label for currency selection box
- Label for search
- CTA button label
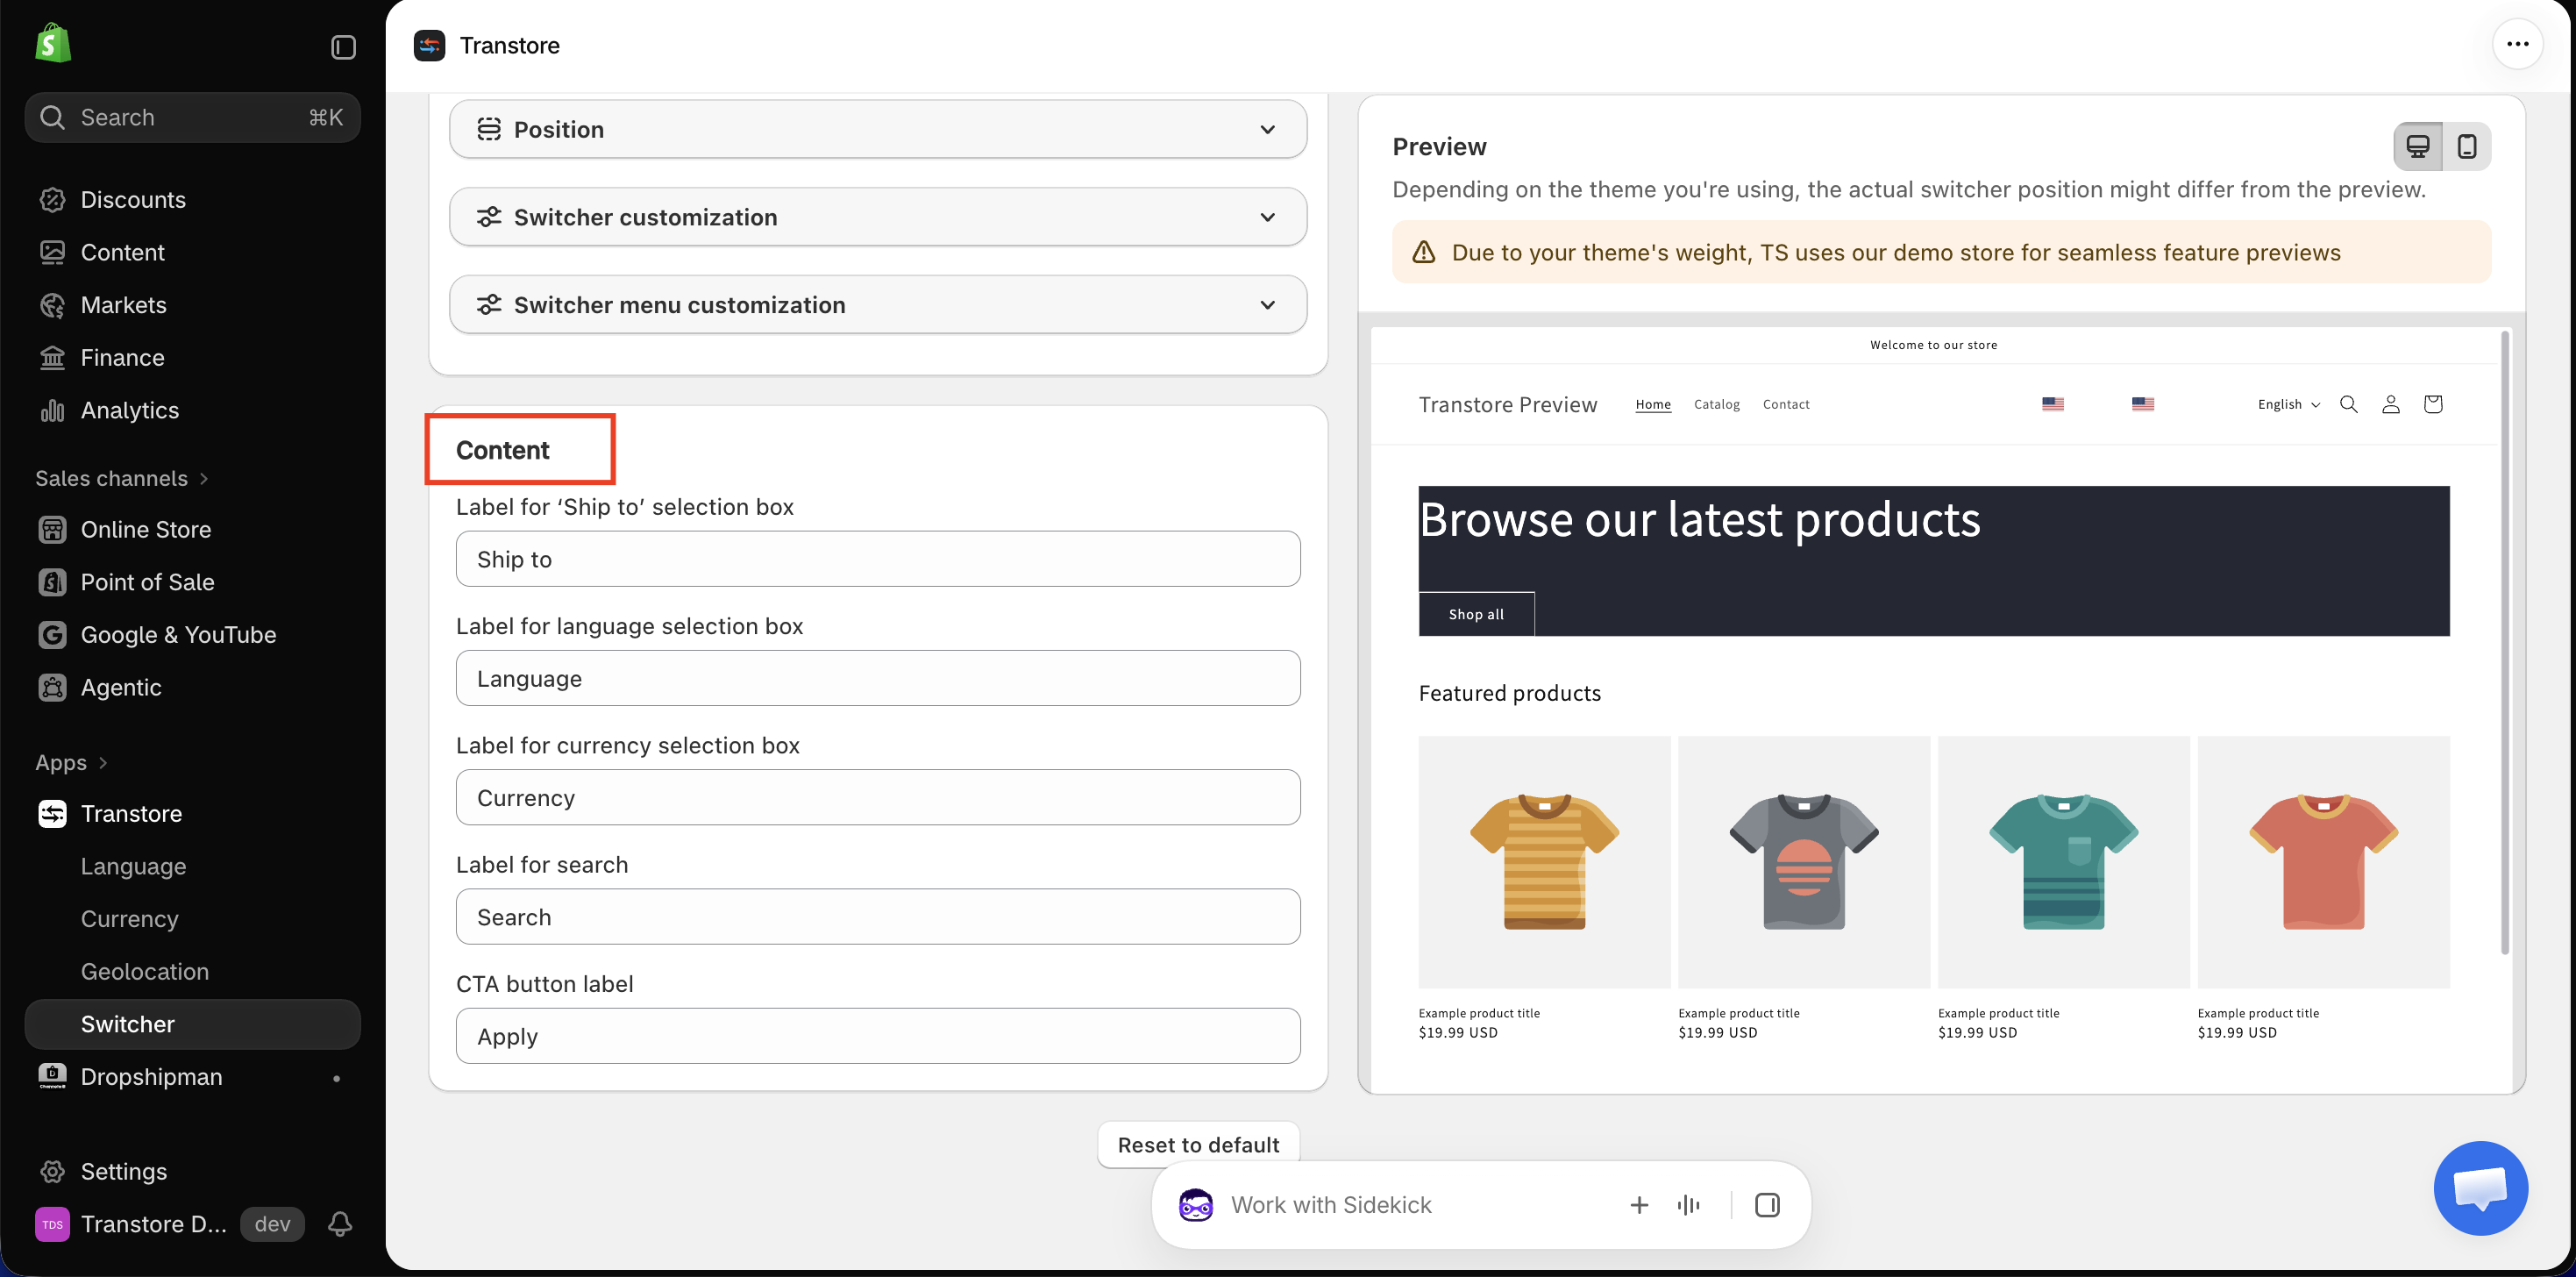
Use the Preview panel to check your changes on desktop and mobile. To restore the original labels, click Reset to default.
If you have any questions or need help customizing the Switcher, please contact us at [email protected]. We’re happy to help.